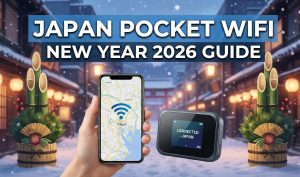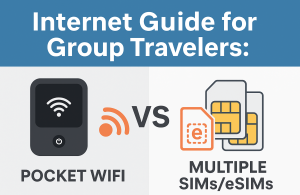
Staying connected in Japan is essential for navigating with Google Maps, using translation apps, and sharing your journey. While e-SIMs are popular, a pocket WiFi device is often the best choice for groups, families, or travelers with multiple devices.
Renting one is incredibly simple. This guide breaks down the entire process into four easy steps.
The 4-Step Guide to Renting Your Japan Pocket WiFi
Step 1: Book Your Pocket WiFi Online (1-3 Weeks Before Your Trip)
This is the most important step, as “on-arrival” rentals are significantly more expensive and may be sold out.
When to Book
- Peak Season (March-May, Oct-Nov): Book at least 3-4 weeks in advance. Cherry blossom and fall foliage seasons see extremely high demand.
- Off-Season: Booking 1-2 weeks in advance is generally safe.
How to Choose Your Plan: Key Factors
When you book, you’ll select a plan. Here is what to look for:
- Data Limit (The “Unlimited” Trap): Most “unlimited” plans have a Fair Usage Policy (FUP). This means that after using a certain amount of data (e.g., 3GB or 5GB) in one day, your speed will be “throttled” (slowed down) until midnight.
- 3GB/Day: Perfect for 1-2 people for maps, browsing, social media, and light streaming.
- 5GB-10GB/Day: Better for families or groups who will all be connected, or if you plan to stream videos.
- Truly Unlimited: A few providers, like Japan Wireless, offer premium plans with no FUP or throttling, which is ideal for business travelers or heavy users.
- Network Coverage: Providers primarily use one of two networks:
- Docomo: Generally considered the best for wide, rural coverage. If you are hiking or visiting remote countryside, choose a provider on the Docomo network (like Sakura Mobile).
- SoftBank: Has excellent, fast speeds in all major cities and tourist areas (like Tokyo, Kyoto, Osaka). Most popular budget-friendly providers (like Ninja WiFi) use SoftBank.
- Battery Life: Most devices last 8-12 hours. It is highly recommended to also carry a portable power bank to ensure your device lasts the entire day.
- Number of Devices: Most models allow you to connect 10-15 devices simultaneously.
PREMIUM WIFI
FROM $4.2/DAY
- Unlimited Data, No Throttling
- Power bank provided for free!
- 10-hour battery life
- Connect up to 10 Devices
Step 2: Choose Your Pickup Location (Airport or Hotel)
During the online booking, you will select where to pick up the device. This choice depends entirely on your arrival time and convenience.
Option 1: Airport Pickup (Most Popular)
This is the most common method, allowing you to get connected the moment you clear customs.
- Pros: Instant internet access for navigating to your hotel.
- Cons: Rental counters have set operating hours (e.g., 7:00 AM to 9:00 PM).
- Pickup Location: You will pick it up from one of two places in the arrivals hall:
- A staffed provider counter.
- An airport post office counter.
Common Pitfall: The Late-Night Arrival What if your flight lands at 11:00 PM and the counters are closed? You have two solutions:
- 24/7 Pickup: Some providers offer pickup from 24/7 locations, like a specific post office in Haneda or Narita, or automated lockers.
- Hotel Delivery: This is the safest option for late-night arrivals.
Option 2: Hotel Delivery
You can have the device delivered directly to your hotel’s front desk.
- Pros: It will be waiting for you when you check in, with no lines. This is the best solution for late-flight arrivals.
- Cons: You will not have WiFi to get you from the airport to your hotel (a good workaround is to use the free airport WiFi to download an offline Google Map).
Expert Tip: Match Your Names! If you choose hotel delivery, you must enter the booking name exactly as it appears on your hotel reservation. If the names do not match, the hotel front desk may refuse to accept the package.
Step 3: Pick Up and Activate Your Device Upon Arrival
Once you arrive in Japan, follow your pickup instructions.
The Pickup Process
- At the Airport: Go to the counter or post office specified in your confirmation email. Show them your passport and confirmation email (on your phone is fine).
- At the Hotel: Simply tell the front desk, “I have a package waiting for me.”
You will be handed a small, zipped pouch.
What’s in the Pouch?
- The Pocket WiFi device itself.
- A USB charging cable and an AC wall adapter.
- A portable power bank (if you ordered one, or if it was included at no additional cost with your Japan Wireless WiFi order).
- An instruction manual.
- Crucially: A pre-paid, pre-addressed return envelope. (Do not lose this!)
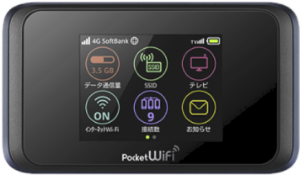
How to Activate (It Takes 30 Seconds)
- Turn on the device by holding the power button.
- On the device’s screen, find the network name (SSID) and the password (Key/WPA).
- On your phone, go to Settings > WiFi.
- Select the SSID from the list of available networks.
- Enter the password when prompted.
- You are now connected to the internet.
Step 4: Return the Device Before Your Departure
Returning the device is even easier than picking it up.
The Return Process
- At the end of your trip (on your last day), place the pocket WiFi device, all cables, and any accessories back into the pre-paid return envelope provided in the pouch.
- Seal the envelope.
- Drop the sealed envelope into any bright red Japan Post mailbox in the country.
Where to Find a Mailbox
- On almost any major street corner.
- Inside many convenience stores (like Lawson or FamilyMart).
- The Best Option: Inside your departure airport (e.g., Narita, Haneda, Kansai). There are always mailboxes in the terminal before you go through security and immigration.
Common Pitfall: Forgetting to Return If you accidentally take the device home, you will be charged expensive daily late fees and you will have to pay for costly international shipping (like DHL or EMS) to send it back.
What if I lose the return envelope? Don’t panic. Go to any convenience store (Lawson is best) or post office and purchase a “Letter Pack Light” envelope (it’s blue and costs around 430 JPY). Place the items inside, and you can still drop this in any mailbox. You will need to write the provider’s return address on it (check their website).
Comparing Top Pocket WiFi Providers in Japan
To help with Step 1, here is a quick comparison of the most common providers.
Summary: Your 4-Step Rental Checklist
- Book Online: 1-3 weeks in advance. Choose a Docomo network plan for rural trips or SoftBank for city trips.
- Select Pickup: Choose Airport Pickup for immediate connection or Hotel Delivery if you arrive late at night.
- Activate: Turn on the device, find the SSID/Password on the back, and connect your phone.
- Return: Place everything in the pre-paid envelope and drop it in any red mailbox before you fly home.